Category: Uncategorized

  • Solar Inverter Problems AGAIN!

    Common Solar Inverter Problems and How to Fix Them (Complete Troubleshooting Guide)

    Key Takeaways

    • Solar inverters can fail due to overheating, wiring errors, firmware glitches, or internal component faults.
    • If your inverter powers the house but doesn’t charge batteries, the issue may be communication or BMS-related.
    • Proper airflow and installation height significantly impact inverter lifespan.
    • Always double-check polarity and fuse connections before powering up.
    • Upgrading to a newer inverter model can improve efficiency by 15–20% or more.

    Introduction

    A solar inverter is the heart of any off-grid or hybrid solar system. When it fails, your entire power setup can grind to a halt. In this guide, we’ll walk through common solar inverter problems, how to diagnose them, and practical solutions to get your system running efficiently again.


    Why Solar Inverters Fail

    Solar inverters work hard every day converting DC power from solar panels into usable AC electricity. Over time, heat, wiring issues, and component wear can lead to system failure.

    Understanding the warning signs early can save you days—or even weeks—without power.


    Problem #1: Inverter Powers the House but Won’t Charge Batteries

    Symptoms

    • Solar panels produce power.
    • House receives electricity.
    • Batteries are not charging.
    • System resets or behaves inconsistently.

    Possible Causes

    1. Battery Management System (BMS) limiting charge.
    2. Communication failure between inverter and battery.
    3. Incorrect charging settings.
    4. Internal inverter fault.

    How to Fix It

    • Restart the battery system and inverter.
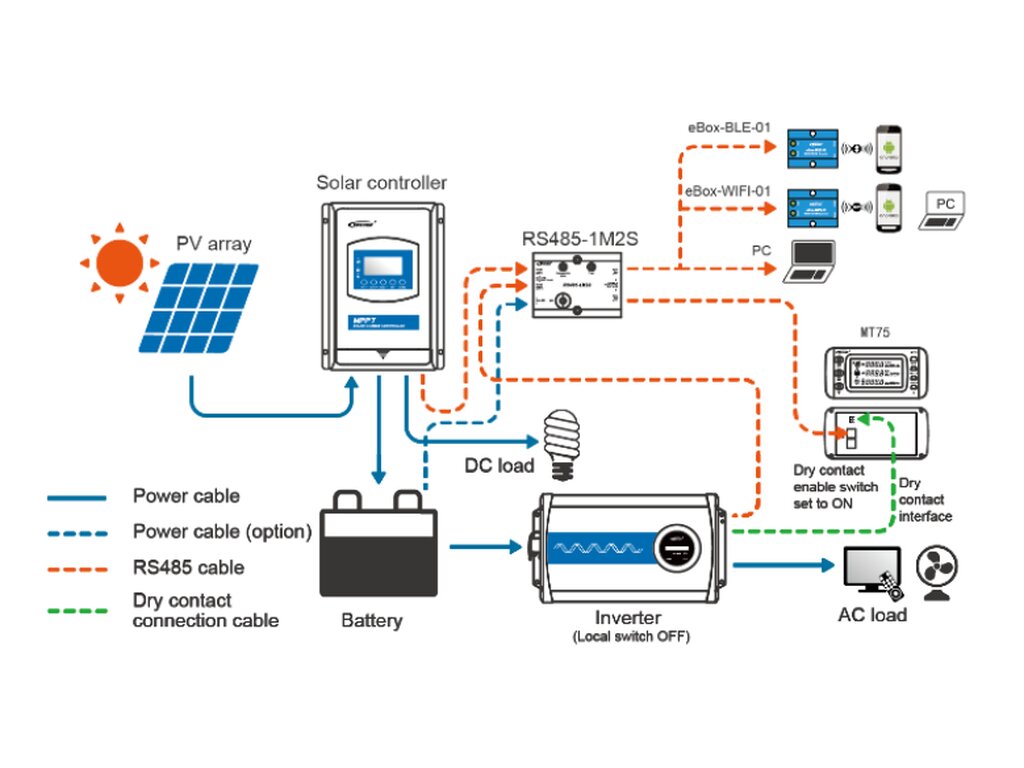
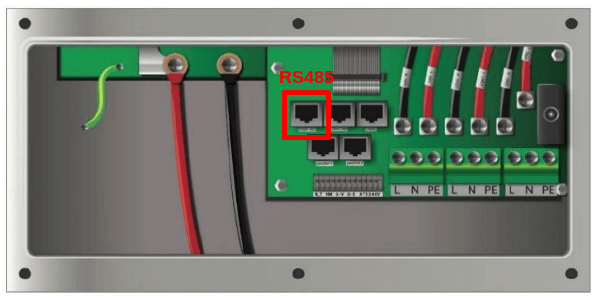
    • Check communication cables (RS485/RS232).
    • Verify charging current settings match battery specs.
    • Confirm battery polarity and connections.

    Modern lithium batteries often include internal BMS protection. This can prevent overcharging even if inverter settings are slightly incorrect.


    Problem #2: Inverter Keeps Restarting or Shutting Down

    Symptoms

    • Unit powers up briefly.
    • Screen lights up, then shuts off.
    • Repeats the cycle continuously.

    Common Causes

    • Internal inverter board failure.
    • Insufficient solar input voltage.
    • Faulty power supply module.
    • Loose wiring or poor earth connection.

    Solution

    • Confirm solar input voltage is within operating range.
    • Inspect all terminal connections.
    • Check earth grounding.
    • If the unit still resets without batteries connected, the inverter itself is likely faulty.

    In some cases, replacement is more cost-effective than repair.


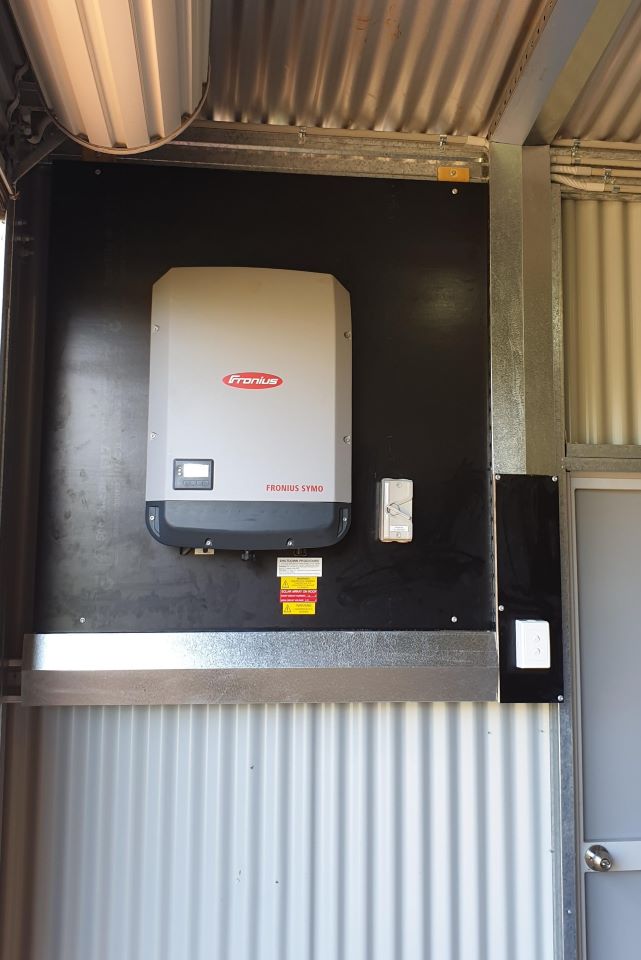
    Problem #3: Overheating and Poor Airflow
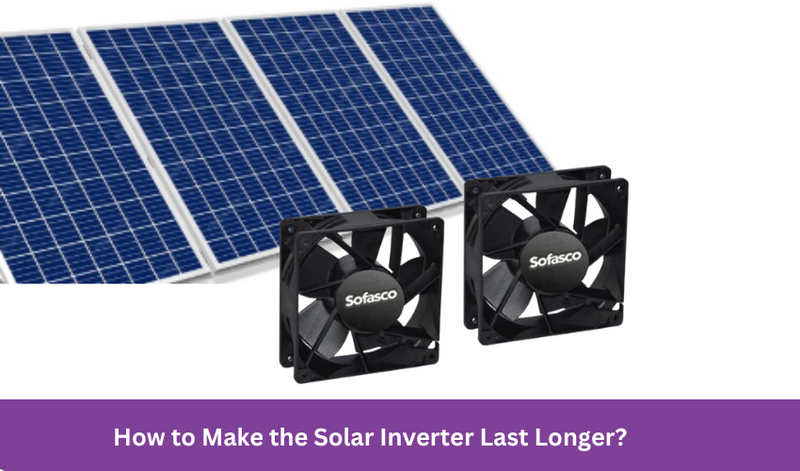
    Image
    Image
    Image
    Image

    Why It Happens

    Inverters generate heat during operation. If mounted too close to walls, fuse boxes, or ceilings, airflow becomes restricted.

    Cooling fans must have adequate clearance—usually at least 20 cm around ventilation areas.

    Fix

    • Mount the inverter higher on the wall.
    • Ensure vents are not blocked.
    • Avoid enclosing the unit in tight cabinets.
    • Clean dust buildup regularly.

    Proper ventilation can dramatically extend inverter lifespan.


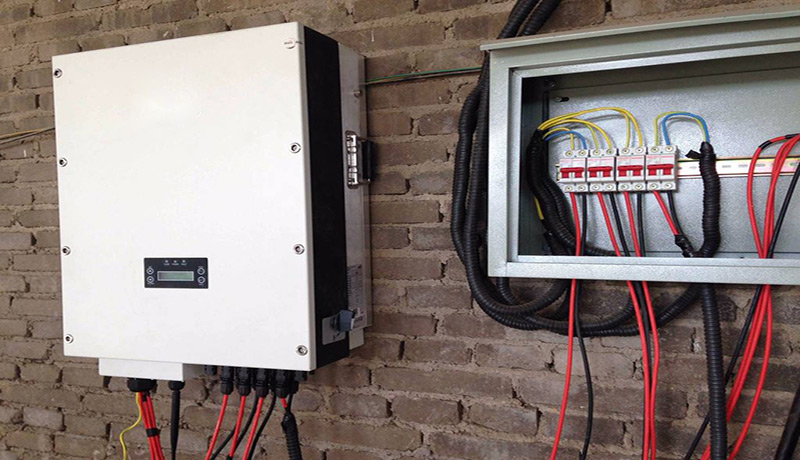
    Problem #4: Wrong Polarity or Wiring Mistakes

    Warning Signs

    • System won’t start.
    • Sparks during connection.
    • Error codes on startup.

    Common Installation Errors

    • Live and neutral reversed.
    • Solar PV cables connected incorrectly.
    • AC input and AC output swapped.
    • Incorrect fuse positioning (supply should enter from top in many systems).

    Prevention Checklist

    • Match wire colors carefully (local wiring standards may vary).
    • Double-check polarity before powering on.
    • Use appropriate cable thickness (6mm² or 10mm² depending on load).
    • Confirm all supplies enter correct fuse terminals.

    Many inverters have reverse polarity protection—but never rely on it.


    Problem #5: Poor Efficiency or Low Output

    Example Scenario

    An older inverter may produce 1,320W under optimal conditions. A newer model under the same conditions could generate 1,600W or more.

    That’s a significant efficiency increase.

    Why Efficiency Drops

    • Aging internal components.
    • Outdated MPPT technology.
    • Thermal throttling due to overheating.
    • Suboptimal firmware.

    Solution

    • Upgrade to a newer inverter model.
    • Adjust MPPT settings.
    • Improve airflow.
    • Monitor output via Wi-Fi tools.

    Problem #6: Wi-Fi Monitoring Not Connecting

    Image
    Image
    Image
    Image

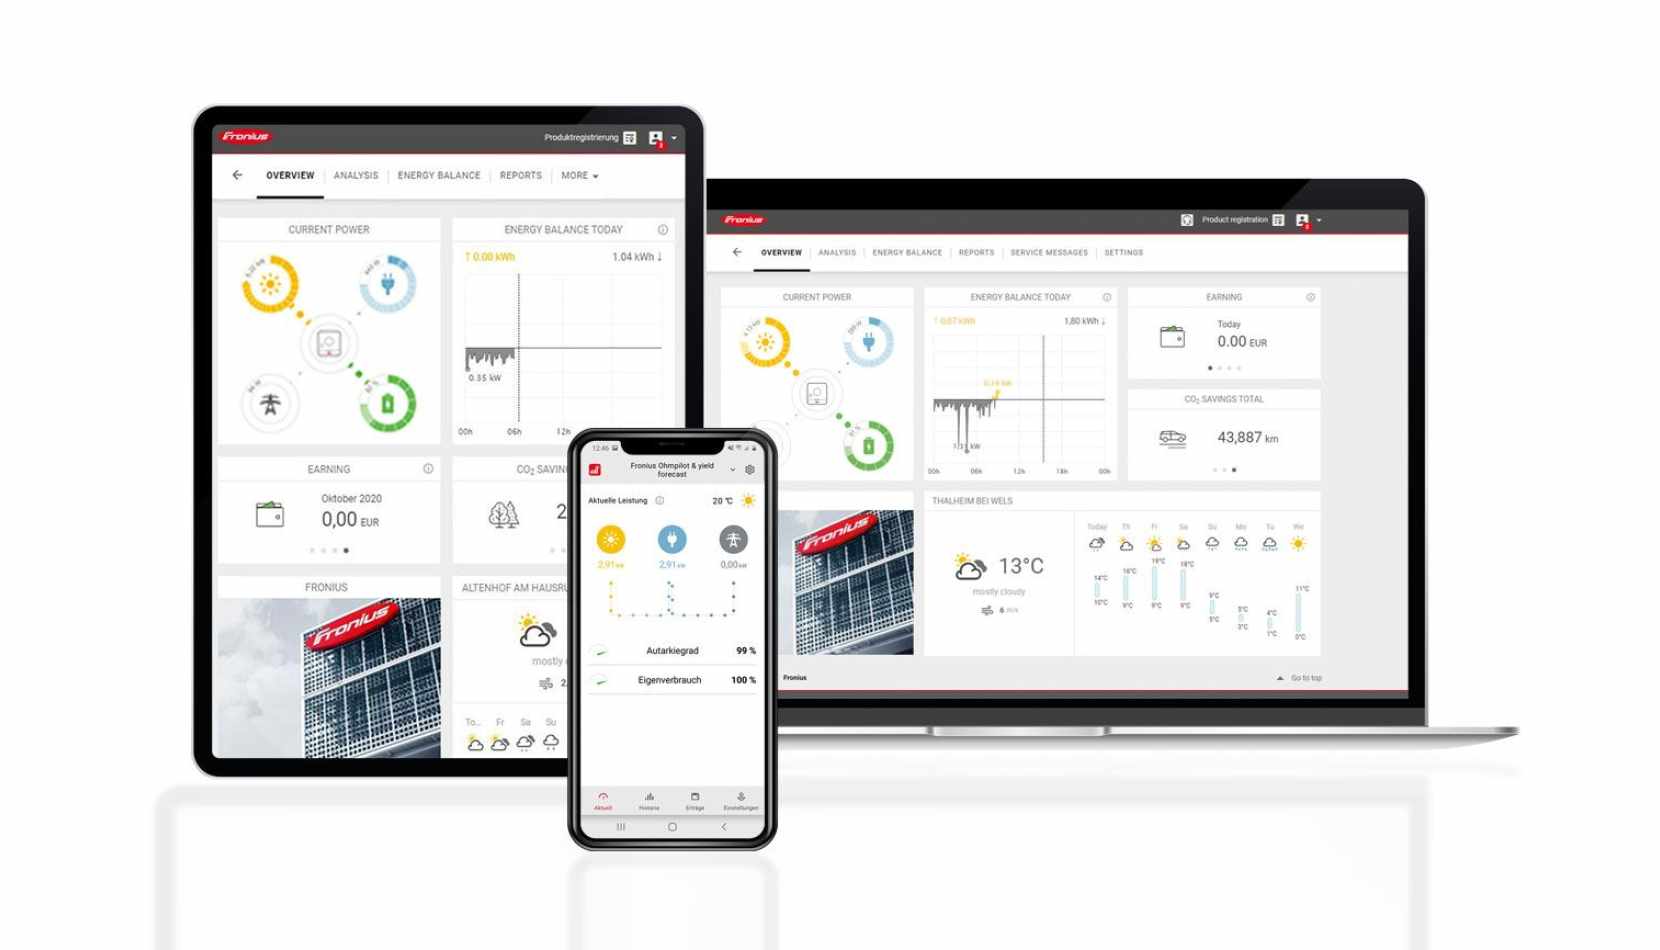
    Modern inverters often include Wi-Fi monitoring.

    Common Setup Mistake

    You must connect directly to the inverter’s Wi-Fi network first—just like setting up an action camera.

    Some smartphones automatically switch back to known Wi-Fi networks if there’s no internet detected. This interrupts setup.

    Fix

    • Connect to the inverter’s Wi-Fi network manually.
    • Disable mobile data temporarily.
    • Use a secondary device if necessary.
    • Complete setup before switching back to your main network.

    Once configured, monitoring allows you to track performance remotely.


    When to Replace Instead of Repair

    If your inverter:

    • Is several years old
    • Has repeated hardware failures
    • Lacks modern MPPT efficiency
    • Costs nearly as much to repair as replace

    …it’s often smarter to upgrade.

    Newer 6,000W+ hybrid inverters now cost significantly less than older models did just a few years ago.


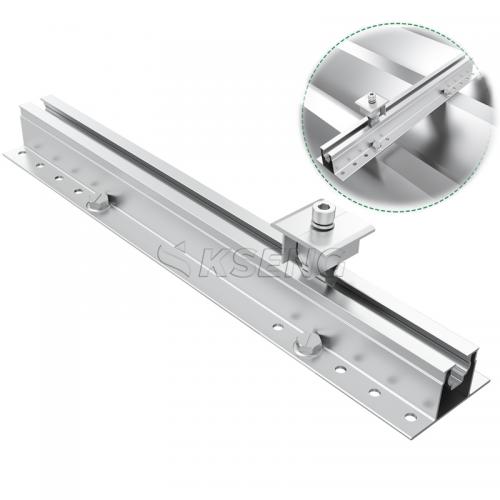
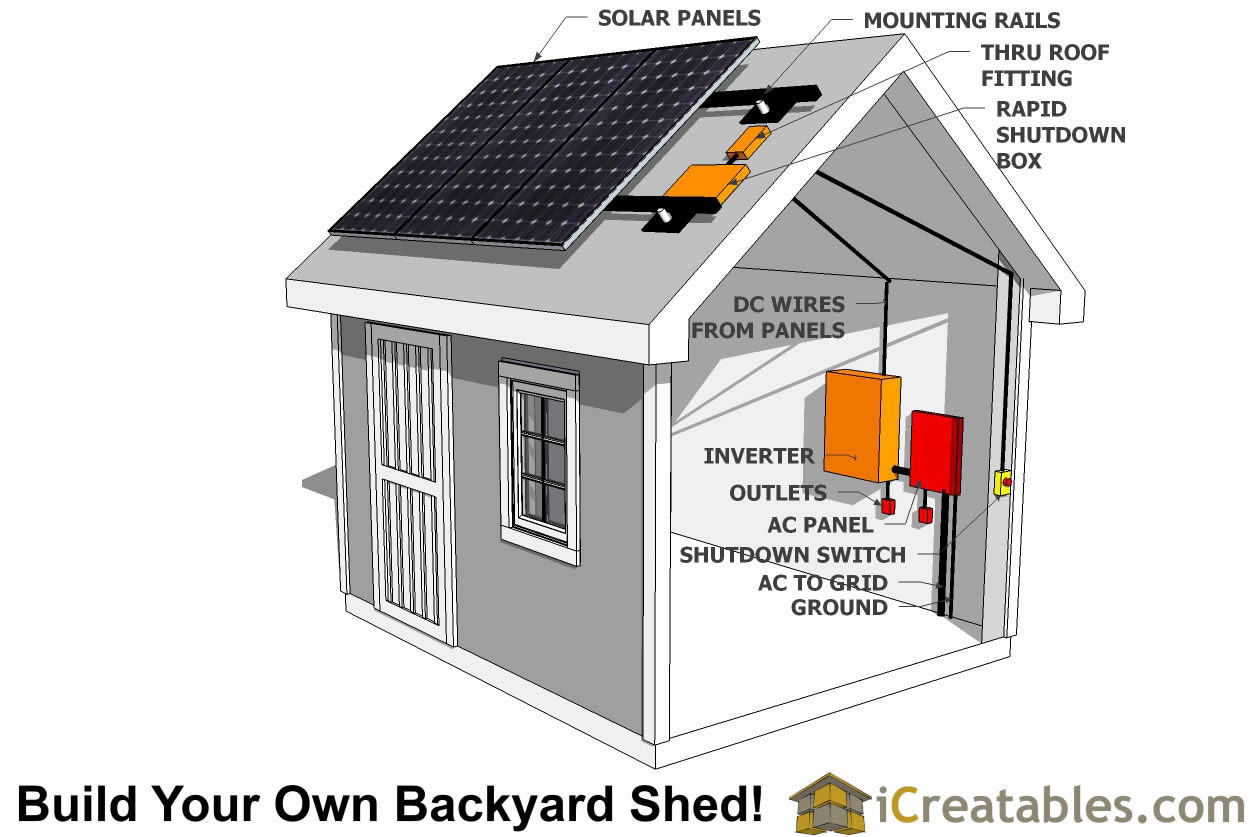
    Safe Solar Inverter Installation Best Practices

    1. Proper Grounding

    Install a surge protection device and ensure a dedicated earth rod—especially in areas prone to thunderstorms.

    2. Correct Cable Sizing

    • AC output: typically 10mm² for higher loads.
    • Generator/utility input: usually 6mm².
    • PV cables: double-insulated solar-rated cable.

    3. Install Order Matters

    1. Mount inverter.
    2. Connect earth.
    3. Connect AC out.
    4. Connect AC in (generator/utility).
    5. Connect batteries.
    6. Connect solar panels last.

    Always connect live power sources last.


    Final Thoughts

    Solar inverter problems can range from simple wiring errors to full hardware failure. Careful diagnostics, correct installation, and adequate ventilation can prevent most issues.

    When in doubt, upgrading to a newer, more efficient inverter can improve performance, reliability, and monitoring capabilities.


    Frequently Asked Questions

    1. Why is my solar inverter not charging my batteries but still powering my house?

    This usually indicates a communication issue with the battery system, incorrect charge settings, or an internal inverter fault.

    2. How long should a solar inverter last?

    Most quality inverters last 5–10 years. Proper ventilation and correct installation significantly extend lifespan.

    3. Can I run my house directly from solar panels without batteries?

    Yes, many hybrid inverters can power a house directly from solar during daylight without batteries connected—but only if solar input is sufficient.


    If you’re troubleshooting your system right now, start with airflow, polarity, and communication cables—those are the most common causes of failure.

  • Unusual Solar Upgrade – 1200W on a South Facing Wall

    Thinking Outside the Box: Mounting 600W Solar Panels on My Gable Wall for Serious Winter Gains

    Introduction: Why the Standard Setup Wasn’t Enough

    For most of the year, my off-grid solar system performs beautifully. From early spring through late autumn, it easily keeps up with daily loads, battery charging, and the general energy demands of modern self-reliant living.

    But winter? That’s where the real test begins.

    My current system consists of:

    • A 6.2 kW hybrid inverter
    • Two 2.4 kWh lithium batteries (4.8 kWh total storage)
    • Six 330W roof-mounted solar panels (1.98 kW array)

    For roughly 8–9 months of the year, that setup is more than enough. But during the final 3–4 months—short days, low sun angles, and persistent grey skies—the system starts to struggle.

    Winter here means:

    • 8 hours of potential charging
    • 16 hours running on batteries
    • Multiple consecutive overcast days

    And when that happens, I’m forced to rely on a backup generator.

    Last winter was particularly harsh. Cloud cover lingered for weeks, and the generator ran far more than I was comfortable with. That’s not the kind of self-reliance I aim for.

    So instead of adding more roof panels in the usual way, I decided to try something different.


    The Problem: Low-Light Winter Charging & Generator Dependency

    On a typical grey January morning at 9:50 AM, my system was only producing:

    • 108 watts
    • 0.5 amps of PV charging current

    That’s barely a trickle.

    With the sun low on the horizon and often diffused through heavy cloud cover, roof-mounted panels at a shallow pitch simply don’t perform optimally.

    The Core Winter Challenges

    • Low sun angle
    • Heavy cloud cover
    • Reduced daylight hours
    • Batteries drained overnight for 16+ hours
    • Generator kicking in after multiple dull days

    I didn’t need more summer production.

    I needed better winter production, especially in low-light, early-morning conditions.


    The Solution: A South-Facing Gable Wall Solar Array

    Instead of expanding upward on the roof, I went vertical.

    I mounted two 600W solar panels on the south-facing gable end of the house.

    This configuration is unusual—but extremely effective for winter solar.

    Image
    Image
    Image
    Image

    Why Vertical Panels Work in Winter

    Vertical panels:

    • Capture low-angle winter sun more directly
    • Shed snow naturally
    • Stay cleaner during muddy seasons
    • Perform surprisingly well in diffuse light

    During winter, the sun never climbs high in the sky. Roof panels optimized for summer can underperform during these months. A vertical south-facing surface, however, can be much better aligned to winter sun angles.


    Expandability: The Most Important Rule in Off-Grid Design

    One thing I always emphasize:

    Design your solar system to be expandable.

    No matter how carefully you calculate your loads, real life changes:

    • Appliances get added.
    • Usage patterns evolve.
    • Weather varies from year to year.
    • Efficiency losses accumulate.

    If your system is boxed in with no upgrade path, you’ll regret it.

    Fortunately, when I built this system, I left:

    • Spare cable loops
    • Accessible junction points
    • Ducting pathways for future expansion

    That made this upgrade possible without tearing apart half the installation.


    The Configuration: How I Wired the New Panels

    The two new 600W panels were wired in series with the existing array.

    After installation, I checked system voltage:

    • Before: ~240V
    • After: ~317V

    That confirmed proper series wiring.

    ⚠️ Important Safety Warning:
    Always fully disconnect panels from both the inverter and the array before cutting or modifying DC wiring. Solar panels generate voltage whenever exposed to light—even on cloudy days.

    Efficiency Trade-Off (Temporary)

    Because the 600W panels are in series with 330W panels:

    • The higher-wattage panels are limited by the lower-rated ones.
    • I’m currently losing roughly 45% of potential output from the 600W units.

    This is temporary. Once I complete a second roof string, I’ll rebalance the system and reduce mismatch losses.


    Mounting System: Adapting a Flat Roof Kit for Wall Use

    Instead of fabricating aluminum brackets (which became cost-prohibitive due to shipping), I used a flat roof mounting kit and adapted it for vertical wall installation.

    Image
    Image
    Image
    Image

    The kit included:

    • Mounting rails
    • End clamps
    • Mid clamps
    • Rubber isolation pads
    • Bolts (which I replaced with longer masonry anchors)

    Installation Notes

    • Panels mounted ~20 cm above ground to avoid splashback.
    • Heavy-duty masonry screws replaced included fasteners.
    • Brackets staggered to preserve wall integrity.
    • Cables secured with adhesive clips to prevent wind vibration.
    • Waterproof glands used at entry points.

    ⚠️ Never rely on supplied fasteners blindly.
    Always confirm they’re suitable for your substrate (brick, block, concrete, timber, etc.).


    Parts & Tools Used

    Below is a simplified list of major components used in this upgrade:

    Solar Components

    • 2 × 600W Solar Panels – [INSERT AMAZON/ALIEXPRESS LINK]
    • Wall Mounting Bracket Kit – [INSERT AMAZON/ALIEXPRESS LINK]
    • 6mm Solar PV Cable (Black & Red) – [INSERT AMAZON/ALIEXPRESS LINK]
    • MC4 Connectors – [INSERT AMAZON/ALIEXPRESS LINK]
    • Waterproof Cable Glands – [INSERT AMAZON/ALIEXPRESS LINK]

    Tools

    • SDS Hammer Drill
    • Masonry Drill Bits
    • Cable Cutters
    • MC4 Crimp Tool
    • Insulation Tape
    • Ratchet Straps (for lifting panels safely)
    • Ladder + Temporary Panel Support Brackets

    The Result: Measurable Winter Improvement

    After installation, I waited for comparable low-light conditions to test output.

    Before upgrade:

    • 108 watts
    • 0.5 amps

    After upgrade (worse visible sun conditions):

    • 117 watts
    • 1.3 amps

    That’s more than double the charging current under similar winter conditions.

    Even more importantly:

    • Early morning direct sun now instantly delivers 100–200 watts
    • Batteries begin charging sooner
    • Generator usage will be significantly reduced

    And remember:

    This improvement is happening despite mismatch losses from series wiring.

    Once I reconfigure the strings properly, performance will improve even further.


    Why This “Unusual” Setup Makes Sense for Off-Grid Living

    Standard solar advice often assumes grid-tied systems optimized for annual yield.

    Off-grid systems are different.

    We care about:

    • Winter survivability
    • Battery recovery speed
    • Low-light performance
    • Generator reduction
    • System redundancy

    A vertical winter-biased array isn’t standard—but it’s strategic.

    If you live off-grid in northern latitudes, adding a vertical south-facing array can dramatically improve winter resilience.


    Final Thoughts: Practical Self-Reliance Over Textbook Perfection

    This upgrade wasn’t flashy.

    It wasn’t symmetrical.
    It wasn’t textbook perfect.
    And it certainly wasn’t “standard.”

    But it solved a real-world problem.

    Self-reliance isn’t about building the prettiest system. It’s about building one that keeps your lights on in January when the sky is grey and the batteries are low.

    If you’re designing or upgrading your own off-grid solar setup, ask yourself:

    • Is my system expandable?
    • Am I optimized for winter, not just summer?
    • Where is my weakest seasonal performance?
    • Can I think outside the roof?

    Sometimes, the best upgrade isn’t upward.

    It’s sideways.


    If you’re interested in the next stage—rebalancing panel strings and reducing mismatch losses—stay tuned. That’s where we fine-tune this system and push efficiency even further.

    Self-reliance isn’t static. It evolves.